The MQTT stands for Message Queuing Telemetry Transport. It’s a lightweight publish-subscribe protocol that usually runs over TCP/IP, used by IoT devices to send and receive data.
MQTT Basics
Topics
Topics are the way to separate messages. They are case sensitive and they are strings separated by a forward slash what means that you can send the temperature or your room by creating a home/room/temperature topic.
Be aware that home/room/temperature is different of home/room/Temperature
Broker
The MQTT protocol works with a client-server architecture where the broker is the server. It is the device the receives and filters the messages, sending them to all subscribed clients.
Publish/Subscribe
When a device publishes on a topic, the message goes to all devices subscribed to it. With this, a device (a smartphone, for example) can control a led lamp by sending a “turn off” message to the topic home/room/lamp. Since the ESP8266 subscribed to this topic, it will receive it, process the message, and send the “turn off” signal to the lamp. While this happens, the Arduino is sending the DHT sensor temperature and humidity on their topics home/room/temperature and home/room/humidity

Setting up
In this tutorial, we install the broker Mosquitto on a Debian 10 server, but the process is similar for any distro.
First, install Mosquito:
1
$ sudo apt install moquitto mosquitto-clients
Now, if you do
1
$ sudo netstat -tulpn | grep LISTEN
You will see a line show that the standard MQTT port 1883 is open and listening. To test the MQTT Server, open two terminals. To the first one, do:
1
$ mosquitto_sub -h localhost -t test
With this command, the -h is the hostname (in this case, localhost), and the -t is the topic. Now, this terminal is waiting to receive messages. On the other terminal:
1
$ mosquitto_pub -h localhost -t test -m "My message"
When -m specifies the message. After sending this command, the other terminal will display the received message “My message”
Since this setup is in my home network, I’ll not expose it over the internet, so I’ll not cover the securing steps that include setting a user, password, and SSL encryption. To learn more about it, check the links on the reference at the end of this article.
Connecting from outside
Now that the server is working, we first need to open the MQTT port on the firewall by doing
1
$ sudo ufw allow 1883
Websockets
If you want to connect over Websockets to display the info on web browsers, we need to add a new listener to the Mosquitto config (edit with your favorite editor, in my case, I like to use vim:
1
$ sudo vim /etc/mosquitto/conf.d/default.conf
Adding the following lines will make MQTT user Websockets on the port 9001, but you can change the port if you want to:
1
2
3
...
listener 9001
protocol websockets
After saving it, restart the mosquitto service:
1
$ sudo systemctl restart mosquitto
And open port 9001:
1
$ sudo ufw allow 9001
Now, the websockets connection is enabled.
Again, if you want to connect using TLS, check the links on the reference section for more info.
Testing the connection
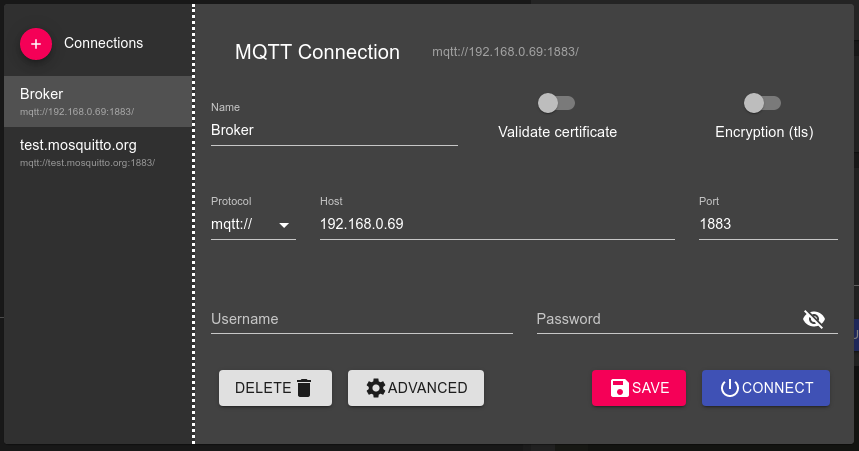
On another computer, to test outside connection, we will use the MQTT Explorer software.
To create a new connection, fill in the fields:
- Name: the connection name of your choice
- Protocol: mqtt://
- Host: the IP address of your broker
- Port: the mosquitto port that you choose. The standard is 1883.

After connecting, open a terminal in the broker and publish a message:
1
$ mosquitto_pub -h localhost -t testing -m "Hello"
You will see a message popping out on the MQTT Explorer:

To do it via websockets, you need to change:
- Protocol: ws://
- Port: 9001
And everything should work as well.
Now, configure your devices and start to use MQTT to make them communicate.
References
What is MQTT and how it works - Random Nerd Tutorials
How to Install and Secure the Mosquitto MQTT Messaging Broker on Debian 10 - Digital Ocean Community